Industrial piping systems rely heavily on the continuous sealing efficiency of butterfly valves. However, due to chemical exposure, severe cavitation, or natural mechanical lifecycle wear, field engineers frequently encounter operational failures.
Repairing a butterfly valve requires strict pressure isolation, systemic disassembly, component degradation assessment, and precise re-torque protocols. Key wearable parts—including elastomer seat seals, O-rings, stem packing, and shaft pins—must be inspected and replaced to restore optimal cross-line seal metrics.
Whether you are managing standard metallic arrays or specialized plastic butterfly valves, following a certified mechanical protocol prevents premature pipeline failure and minimizes costly facility downtime.
Step-by-Step Protocol to Repair a Butterfly Valve
I used to think high-performance valve overhauls were only for niche manufacturer specialists. But with the right industrial steps, safety guidelines, and field tools, even maintenance technicians can execute a flawless overhaul.

1. Pre-Repair System Isolation and Preparation
Never attempt to unbolt a valve from an active pipeline. A mistake here can lead to high-velocity fluid projection and catastrophic personal injury.
| Action Item | Technical Engineering Objective | Risk Mitigated |
|---|---|---|
| Isolate Upstream / Downstream | Close adjacent isolating gate or ball valves completely | Continuous fluid line feed into the work zone |
| Complete System Depressurization | Open bleed ports to drop localized line pressure to 0 Bar / PSI | Explosive energy release upon breaking flange seals |
| Drain Residual Media | Thoroughly flush hazardous chemicals or high-temp water out | Skin burns, inhalation hazards, and floor contamination |
| Mark Structural Alignment | Use paint or scoring markers across valve-to-flange alignment zones | Misalignment of disc-to-pipe clearance during re-installation |
2. Disassembly and Component Separation
- Remove the Actuator or Lever: Carefully unbolt the pneumatic actuator, electrical gear operator, or manual hand lever.
- Loosen Flange Bolts Methodically: Back off the structural flange fasteners in an alternate criss-cross pattern. This prevents uneven stress from bending or cracking brittle thermoplastic plastic butterfly valve flange faces.
- Extract the Body: Gently slide the valve body out from between the pipe faces. Use temporary piping spreaders if the pipe faces are too tight, ensuring you do not gouge the gasket faces.
- Extract the Internal Shaft & Disc: Locate and tap out the internal disc retaining pins or retention clips. Carefully slide the main stem (valve shaft) out out of the body collar to free the central sealing disc.
3. Inspection, Cleaning, and Diagnostic Assessment
- Solvent Wash: Clean all detached metallic or plastic components thoroughly with an appropriate industrial cleaning solution or soap matrix to remove mineral scaling, bio-fouling, and old lubricants.
- Inspect the Sealing Zone: Check the inner elastomer seat seal for evidence of cracking, flattening, pitting, or chemical degradation.
- Stem Malfunction Evaluation: Examine the valve stem closely. Look for deep scratches, gouges, or scoring marks. As demonstrated in common field diagnostics, severe internal corrosion or aggressive mechanical hammer force can easily shear retaining pins or lock up internal stem clearances [00:01:34], [00:07:06].
4. Precision Reassembly and Testing
- Orient the Disc Position: Always place the butterfly disc in the partially open position when inserting it back into the elastomer seat. Attempting to force an assembly together with a fully closed disc will warp, stretch, or tear the new rubber seat molding.
- Component Lubrication: Apply a thin layer of specialized, media-compatible silicone or valve grease to the stem threads, shaft bearings, and primary O-ring surfaces.
- Fastener Torque Profile: Hand-tighten all body bolts first. Then, utilize a calibrated torque wrench to lock down flange fasteners using a traditional star pattern to ensure even gasket compression.
Video Tutorial Reference: Butterfly Valve Breakdown & Inspection
To visualize the realistic challenges of dealing with frozen components, heavy internal scale, and locating hidden stem locking pins, review the industrial step-by-step video analysis below:
Essential Tools Needed for Butterfly Valve Repair
Attempting an assembly rebuild without the proper specification tools will deform the components and cause high localized pressure spots.
| Tool Name | Specific Engineering Purpose | Field Best Practice |
|---|---|---|
| Torque Wrench | Tightens flange fasteners to precise foot-pounds/Newton-meters | Prevents crushing thermoplastic flange connections |
| Soft Rubber Mallet | Taps stuck shafts or discs loose without scoring surfaces | Never use a steel hammer on machined valve stems [00:07:19] |
| Pin Punch & Drift Set | Safely drives out tapered internal disc retaining pins | Match punch diameter perfectly to avoid expanding the pin head |
| PTFE / Valve Lubricant | Lubricates moving O-rings and stem packing glands | Ensure the grease type matches your media profile (e.g., EPDM vs. Viton) |
| Digital Calipers | Measures stem wear and seat deformation dimensions | Verifies internal tolerance metrics against OEM standards |
Primary Wearable Components Requiring Regular Replacement
Do not attempt to save budget by reusing old sealing items. Flattened elastomeric profiles cannot re-establish a reliable pressure boundary.

- Elastomer Seat Seal: Subject to Constant friction and chemical attack. Replace instantly if it shows permanent deformation or hairline structural cracks.
- Stem Packing / O-Rings: The primary dynamic barrier stopping external fluid leaks from scaling the actuator shaft. Always replace these during every single teardown.
- Tapered Shaft Pins: Prone to mechanical shear stress and crevice corrosion. Always install fresh, matching alloy pins to guarantee rigid disc-to-stem rotation tracking.
Diagnostic Matrix: Butterfly Valve Failure Indicators
Early identification of component fatigue prevents sudden pipe system pressure bursts and line contamination.
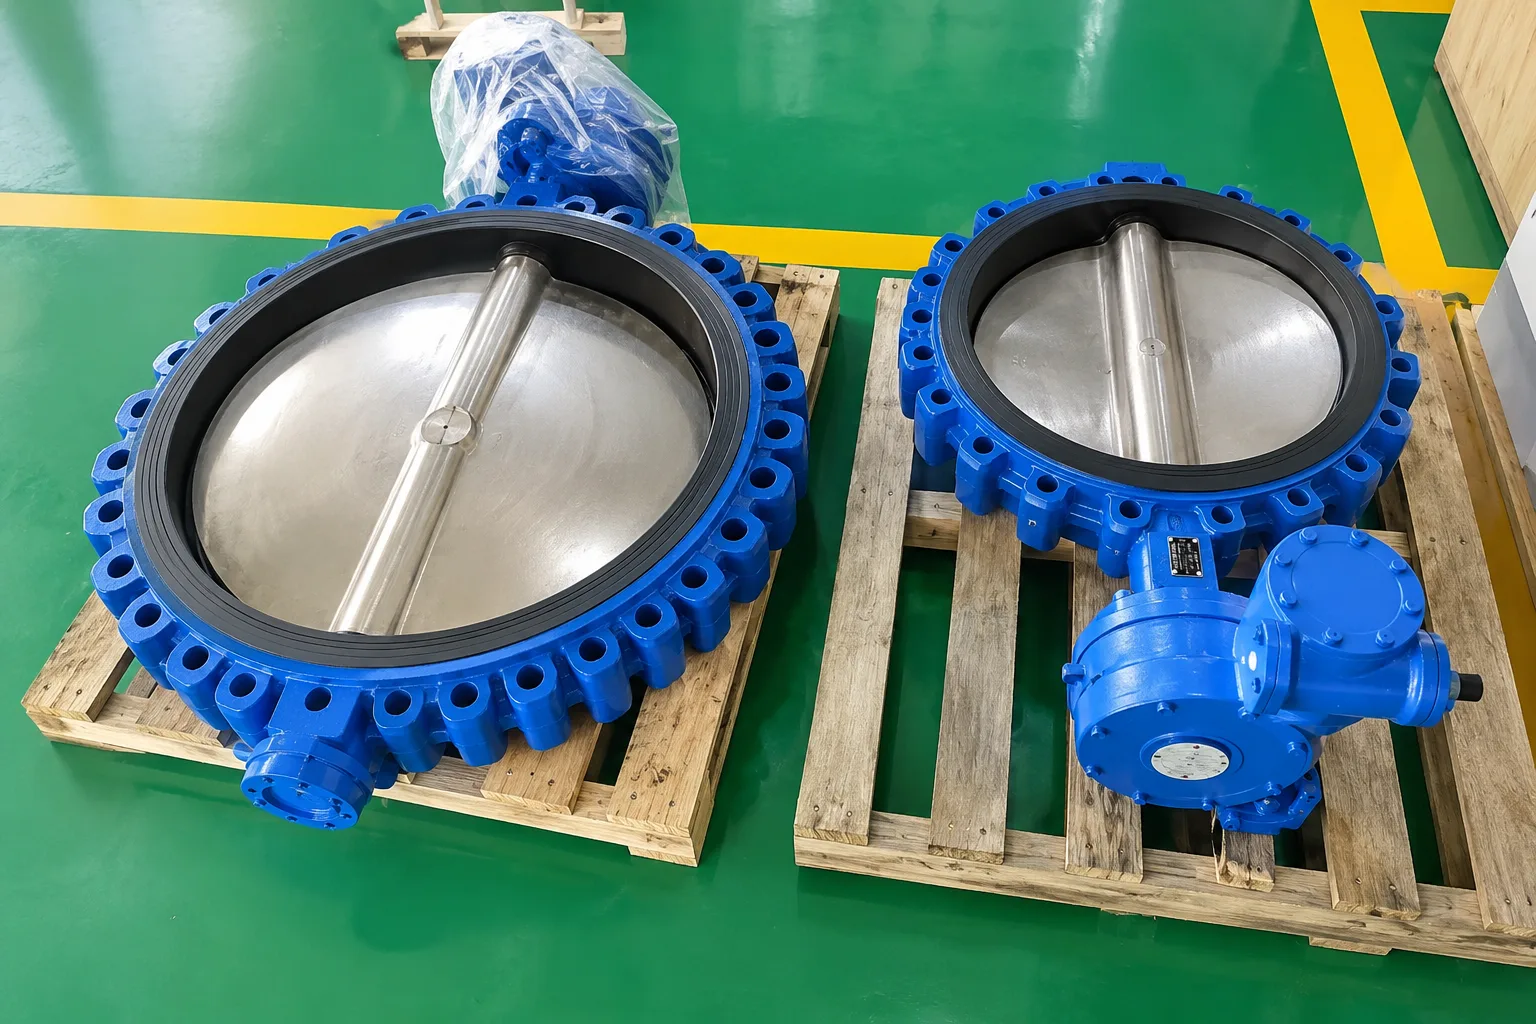
- High Operating Torque / Jamming: The handle or actuator requires excessive force to turn. This points to mineral scale binding the shaft bearings, or a warped internal disc.
- External Stem Tracking (Leaking): Fluid weeping out from the top of the packing gland indicates the primary shaft O-rings have failed.
- Cross-Seat Passing (Internal Leaking): The valve is fully closed, but downstream line pressure continues to rise. This indicates a deeply scored disc edge or a torn elastomeric seat liner.
Frequently Asked Questions (FAQs)
Q1: Is it always more economical to repair a butterfly valve rather than replacing it?
A: No. If internal inspection reveals severe corrosion inside the main body casing, deep gouges along the valve stem, or warped metal disc geometry, the cost of custom re-machining and component sourcing will often exceed the price of a brand-new, factory-certified unit.
Q2: Why must the butterfly disc be left slightly open during line installation?
A: If the valve is fully closed during installation, the clamping torque from the outer pipe flanges will squeeze the rubber seat tightly against the disc edge. When you attempt to open the valve for the first time, the excessive localized torque will shear the actuator pin or permanently rip the rubber liner.
Q3: What is the risk of using a standard steel hammer during disassembly?
A: Steel hammers will mushroom the top of the valve shaft, create structural micro-cracks in cast housings, and deform critical tolerances. Always use a soft rubber, brass, or dead-blow mallet to dislodge stuck components safely.
Q4: Can I repack a butterfly valve stem while the line is under operating pressure?
A: Absolutely not. Attempting to loosen the packing gland or removing retention fasteners while the pipeline is pressurized will cause the line pressure to violently eject the valve stem and internal fluid, leading to severe system damage and personal injury.
Q5: How often should a butterfly valve be cycled if it is rarely used?
A: For stagnant lines or emergency standby networks, the valve should be completely cycled at least once every month. Regular operational cycling sweeps away early mineral scaling and prevents the elastomeric seat from cold-flowing around the disc.
Conclusion
Mastering the repair protocol for butterfly valves allows industrial maintenance teams to maintain operational integrity and extend infrastructure lifecycles. By meticulously managing component cleanliness, honoring OEM fastener torque values, and opting for high-performance replacements like premium plastic butterfly valves in corrosive chemical loops, system operators can eliminate unexpected failure modes and secure long-term hydraulic reliability.